Welcome to Moda!
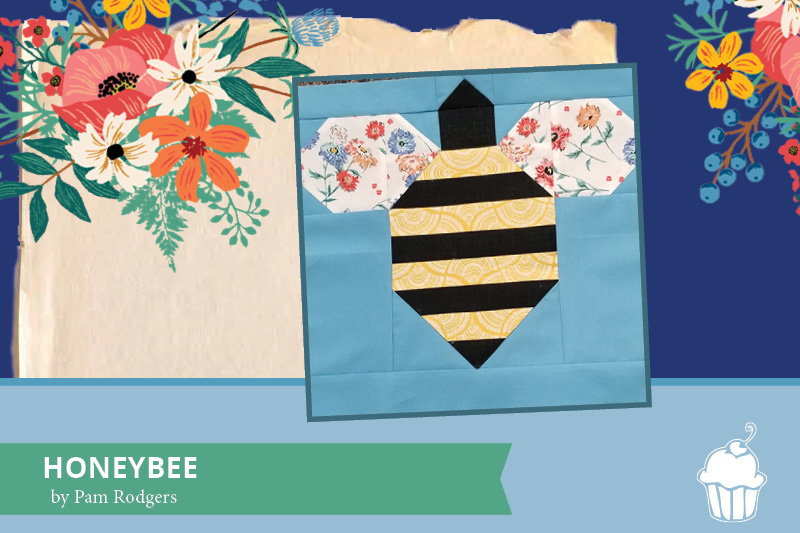
Honeybee
Honeybee
![]()
6" or 12" block
![]()
6” BLOCK
From Fabric 1, cut:
[A] (4) 1” x 3½”
From Fabric 2, cut:
[A] (4) 1” x 3½”
[B] (1) 1¼” x 1½”
[C] (1) 1” x 1½”
From Fabric 3, cut:
[D] (2) 2” x 2¼”
[E] (2) 1½” squares
[F] (2) 1¼” x 1½”
From Background fabric, cut:
[G] (2) 1” x 3”
[H] (6) 1” squares
[I] (2) 1¼” squares
[J] (2) 2” squares
[K] (2) 2” x 3½”
[L] (1) 1¼” x 6½”
12” BLOCK
From Fabric 1, cut:
[A] (4) 1½” x 6½”
From Fabric 2, cut:
[A] (4) 1½” x 6½”
[B] (1) 2 x 2½”
[C] (1) 1½” x 2½”
From Fabric 3, cut:
[D] (2) 3½” x 4”
[E] (2) 2½” squares
[F] (2) 2 x 2½”
From Background fabric, cut:
[G] (2)1½” x 5½”
[H] (6)1½” squares
[I] (2) 2” squares
[J] (2) 3½” squares
[K] (2) 3½” x 6½”
[L] (1) 2” x 12½”
![]()
STEP 1. MAKE BEE
Alternating the black and gold strips, sew together the A pieces ton create the bee body. Bee careful with your ¼” seam allowances, so that your finished piece measures 6-1/2x8-1/2” (12” block) or 3-1/2x4-1/2” (6” block). Press towards the first gold strip, which will be the top of your block.
Sew the J background pieces diagonally from corner to corner at the bottom of the body piece.
Sew the E wing pieces diagonally from corner to corner on the top of the body piece. Trim and press.
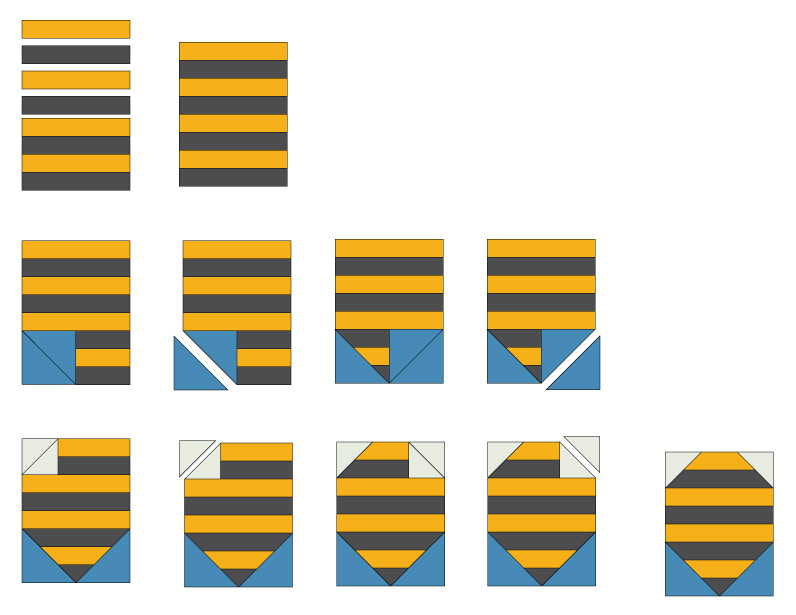
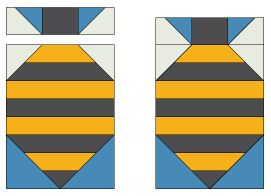
Sew piece I diagonally from corner to corner to piece F. Repeat with remaining I and F pieces.
Sew the I/F piece to each side of the B piece, then sew that to the top of the bee body.
STEP 2. MAKE BEE HEAD
Sew 2 of your H pieces diagonally to one of the longer sides of each of the D pieces. Make 2.
Sew the remaining 2 H pieces diagonally to the C piece. Trim and press.
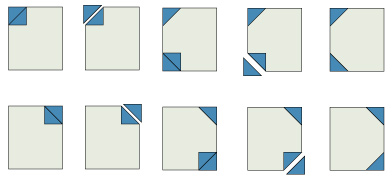
Sew the G pieces to each side of the H/C/H piece. Next, sew the D/H piece to the K piece.
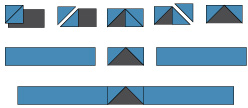
STEP 3. ASSEMBLE BLOCK
Arrange units according to block diagram. Sew units into rows, and sew rows together to form block. Block measures 12½” unfinished or 6½” unfinished.
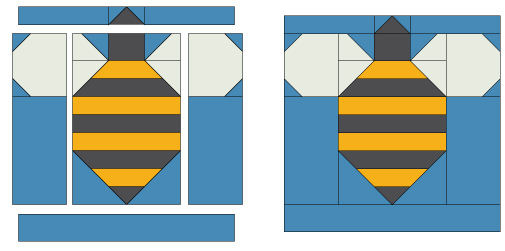
Pam Rodgers
instagram: @quiltypam
Find all Summer in the Garden posts by clicking {HERE}.

Comments